How to Spin Yarn with a Drop Spindle

There is something downright magical about spinning your own yarn. It can literally feel like you've been transported back in time. I find a calm like zen comes over me whilst I'm spinning and my anxious brain switches off. It's a fantastic mindful craft to get into, but starting out can feel really alienating and out of reach - mostly because of the price tag on spinning wheels. But starting the age-old craft of spinning might not be as expensive as you think.
Spinning yarn on a Drop Spindle is one of the easiest and most importantly, cheapest ways to get into hand spinning wool. Meaning it perfect for beginners to sink their teeth into. Creating something out of a literal bag of floof is pure magic. Want to learn more? I'll teach you in this post with some brilliant tips and instructions below.
If you’re like me, and are a visual learner, scroll down to the bottom and check out my new video on how to spin on a drop spindle.
Tools You'll need:
- Drop Spindle
- Fibre
- Leader Yarn
That's it. You literally just need those three things to get spinning your own hand spun yarn. There are a great many varieties of drop spindles and fibres available on the market, from downright cheap and cheerful to beautifully handcrafted and unique.
Picking a Drop Spindle
Drop spindles come in all shapes, sizes and weights, some features affect the usage, some just for plain old prettiness. A spindle is made of two main parts; the spindle shaft – a long straight stick; and the whorl – a cylinder disc which the shaft runs through.
First and foremost, you want a balanced drop spindle that spins true. This means that when it spins, it doesn’t wobble around, which can cause issues when spinning your yarn. The other most important feature to consider is weight; lighter spindles allow for finer spinning, while heavier spindles are good for thicker spinning yarns like Art yarn. Choose a spindle that’s right for your intended yarn.
Most modern spindles also have a hook at one end of the shaft, which provides an easy way of ensuring your yarn does not ‘run away’ from your spindle! Older spindles may simply have a notch on the end, which is not ideal for beginners. The Woollen Wytch Drop Spindle kit actually has two features which stops the yarn from running away- a hook on one end, and a unique petal design that holds the yarn in place as your spinning.

For a beginner, I would suggest a medium-weight top whorl spindle, of about 50g. If you continue to explore spinning, it is worth experimenting with different spindles to find which style you prefer.
Explore your fibre!
Fibre is made up individual hairs that, when twisted, lock together to create yarn. Grasp some of the fibre your working with and pull it from the rest. The hairs should slide past each other and come away easily.
Now, try that again but this time add some twist to the fibre you are pulling by twirling the fibre between your fingers. Keep pulling and keep twisting. You will be able to pull for longer and it will be much stronger. This is how spinning works - it's simply about adding twist, you've essentially just hand spun yarn, it's that easy.
Following the leader.
Using a length of commercial yarn, make a leader - simply take a length of yarn, fold it in half to make a loop and knot the ends together - any knot will do. Wrap the yarn around the shaft a couple of times and then take it up over the whorl and slip it around the hook. Hold the leader with one hand and let the spindle dangle.
Spin the spindle. You can use your fingers on the bottom of the shaft or you can do what I find easiest and roll the spindle along your thigh. Practice spinning the spindle using the leader so that it spins smoothly and evenly. The leader will gradually twist tighter and tighter as you spin it. This is the exact motion you'll be copying with your fibre.
Getting things in motion.
Now onto spinning fibre. You can attach the fibre to your leader by slipping the fibre through the loop of the leader above the hook.
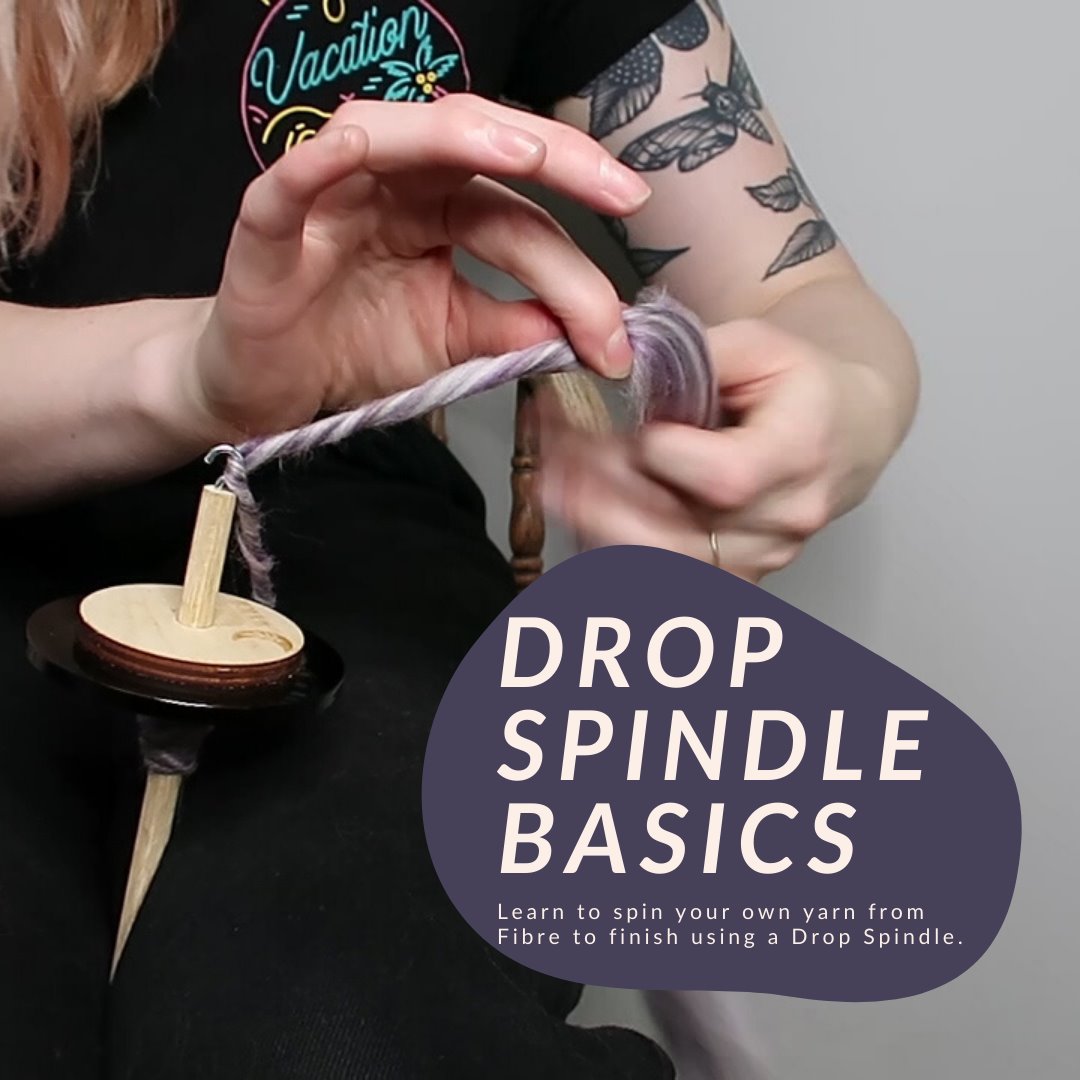
Slowly pull some fibre 'hairs' loose from the main bulk of fibre - this is called drafting. Spin the spindle and allow the twist to move from the leader into the drafted fibre. using one hand gently hold the fibre and use your index finger and thumb to stop the twist moving into the fibre supply.
You'll want to keep the twist from getting into your fibre supply, because otherwise this will make it harder to draft your fibre from.
Your other hand controls the spinning and drafting. Keep drafting and spinning in this way - allowing the twist to move into the drafted fibre until you have an arms length of twisted yarn.
Unhook the yarn from around the hook and, keeping a slight tension, wind everything you've spun around the shaft. Leave some extra yarn to go up and over the whorl and under the hook, ready for your next spin. Repeat these steps and continue spinning and drafting as before.
Spin it. Park it. Draft it.
Many beginners find it easier to draft and spin in two distinct stages rather than trying to do it all at the same time - I know I still find it the easiest way. Spin the spindle and, just before it stops, grasp it with your knees or tuck it under your arm to 'Park it'.
Then you 'Draft it'. Pinch off the twist so it does not travel and draft the fibre while the spindle is parked. You can then release the stored twist you pinched off into your pre-drafted fibre. Remembering to pinch it off before it can enter the fibre supply. Then simply get back to spinning the spindle and repeat the process.
Making a Skein & Setting the Twist.
Once you’ve spun all the fibre, wind the yarn into a large loop or hank. You can do this using a niddy noddy or by using the back of a chair. Wind the spindle around the chair into a loop. Tie both ends of the yarn together. Take 4 pieces of spare yarn and tie them in a loose figure of 8 through the hank at varying places. Around 3 places should be good enough to stop tangling.
Slip the hank off the chair, and grabbing an end with each hand, twist in opposite directions until it’s firm. Fold it in the middle and watch the skein twist back on itself. Take one end and tuck it through the loop on the other end. This is your skein.
To set the twist, soak the skein in a bowl of warm water for around 20 mins or so. Try not to agitate it too much and avoid running the tap over it, as this will cause felting. Drain the water and squeeze the excess from the skein, try your best to not be tempted to wring it. I usually wrap my untwisted skeins in a towel and press to squeeze out the reminder water out.
I then unwrap it, and snap the yarn, much like snapping a whip. This loosens and puffs up some of the fibres giving the yarn more volume and makes them looks lovely and squishy. Leave to your skein air dry.
And the process is finished.
Congratulations! You've just spun your first yarn.

I really hope all of that makes sense. It looks like a lot to take in, but once you've got the hang of spinning and built up the muscle memory it's easy as pie. Seriously, you'll be a pro in no time.
Don't forget, if you haven't got any of the tools and materials, I sell them in the shop. Including beautifully soft hand dyed roving and Drop Spindle Kits.
Still haven't got it or not much for written instructions? Don't worry, I've got you covered. Check out my video below where I take you slowly through the process.

1 comment
Thank you so much for your You Tube video on how to use a drop spindle, your method is some good I have been able to spin. What an inspiration you are. I am considering buying a spinning wheel but firstly I am going to see if my local guild will be able to help by renting or loaning one just in case I don’t take to it which I feel is unlikely. I like the Bliss spinning machine you have it looks simple and straight forward do you have more than one spinning wheel. Do you ply yarn as well on this machine. What other machines did you consider when buying your, did you look at the Lojan Budget Buddy Wheel. Any advice would be most welcome. Happy spinning.